Digital payments in India have become extremely simple, fast, and widely accessible, thanks to the Unified Payments Interface. Whether it is sending money to a friend, paying for groceries, or completing a Utility bill payment, UPI lets you do everything instantly from your phone.
But have you ever noticed a small alphanumeric ID in your UPI app, something like yourname@bank, and wondered what it means? That ID is called a VPA, and it is the reason UPI payments work without requiring you to share sensitive details like your bank account number or IFSC code.
UPI has grown incredibly quickly. From only a few million transactions when it started in 2016, India now processes well over 100 billion UPI transactions annually as of 2024–25. This shows how trusted and safe digital payments have become.
In this blog, you’ll learn what a VPA means, how it works, how to create one, see examples and understand its benefits.
What is VPA?
A VPA stands for Virtual Payment Address. It is a unique ID you create on your UPI app, and it works as a digital address for your bank account. Instead of sharing long bank details every time you need to receive money, you only share your VPA.
This makes the entire payment process faster and much safer.
A VPA has two parts:• A username (your name or number)
• A UPI handle provided by the bank or app
For example:rahul.verma@upi
When someone sends money to this VPA, the amount goes directly to the bank account linked with it. No one can see your account number, branch, or IFSC code. This keeps your bank information secure while still allowing instant transfers.
People use a VPA for all types of UPI transactions, from receiving payments, sending money, paying bills, to making online purchases. A VPA remains the same even if you change your bank branch, but it may change if you switch to a different bank account or create a new UPI ID in another app. It also becomes an easy and reliable way to share your payment details.
How to create your VPA or UPI ID
Every UPI app automatically helps you set up a VPA when you link your bank account. This is how it works:
1. Download any UPI app
You can use apps like:Your bank’s UPI app (such as YONO, iMobile, PNB One, etc.)
Install the app and open it.
2. Register with your mobile number
Enter the mobile number that is linked to your bank account.
The app will send an SMS to verify it.
(Make sure your SIM card is active and has a balance for SMS.)
3. Link your bank account
Choose your bank from the list.
The app will automatically find your account based on your verified mobile number.
You may need to enter your debit card details to complete this step.
4. Set your UPI PIN
Create a secure 4 or 6-digit UPI PIN.
You will use this PIN every time you make a payment.
5. Create or choose your VPA
Most apps automatically generate a VPA for you, but many also let you choose your own.
For example:rahul.verma@upi
You can pick something simple and easy to remember. This depends on the app and the bank’s policies.
6. Your VPA is ready to use
You can now share this VPA with anyone who needs to send you money.
Important Note:
- Some UPI apps allow more than one VPA for a single bank account. The exact number depends on the app and your bank.
- You can’t use a UPI ID/VPA created in one app (for example, PhonePe) directly in another app (like Paytm or Google Pay) or in net banking portals. Suppose you create a VPA on PhonePe, such as michael.scott@sbi. You cannot use the same VPA inside other UPI apps like Google Pay. Each app generates its own VPA handle. Each UPI app generates its own VPA format/handle, so the UPI ID you create in one app belongs only to that app.
- The VPA or UPI ID created through any UPI app becomes the default ID for that bank account in that app, unless you change the default. You can keep the ID you prefer and delete other associated VPAs/UPI IDs if needed.
- You can keep the ID you find the most suitable and delete other associated VPAs/IDs if needed
- The availability of custom VPA creation depends on the specific UPI app and your bank’s guidelines. Usernames are typically unique for each UPI handle or app, so if your desired username is unavailable, try a variation.
- Remember, usernames are typically unique for each UPI handle or app. So, if your desired username is unavailable, try a variation.
Benefits of using a VPA in the UPI app
Using a VPA makes UPI payments easier, safer, and more convenient. Here are the main benefits:
1. No need to share bank detailsYou don’t have to reveal your account number, IFSC, or branch information. Your VPA is the only thing you share, which keeps your banking data private.
2. Faster and simpler paymentsA VPA is easy to type and remember. You can send or receive money instantly without entering long account details every time.
3. 24×7 availabilityYou can make payments at any time day or night, weekends, and even on bank holidays. UPI works round the clock, and so does your VPA.
4. Lower chances of mistakesTyping a long account number can lead to errors. A short and simple VPA reduces the risk of sending money to the wrong person.
5. Strong securityEven if someone knows your VPA, they cannot access your bank account. Every payment requires your UPI PIN to ensure transactions remain secure.
6. One bank account, many VPAsSome apps allow more than one VPA for the same account.
This helps in organising payments. For example, one VPA for personal use and another for business.
Step-By-Step Process of Sending & Receiving Money Using VPA
Sending Money
- Open any UPI app installed on your phone like Google Pay, PhonePe, Paytm, etc
- Enter your app password or use your fingerprint if biometric is enabled
- Click on the “Transfer Money”, “Send” or “Pay” option (depending on the UPI app)
- You will get the option to send money via mobile number, VPA, or by using bank account details
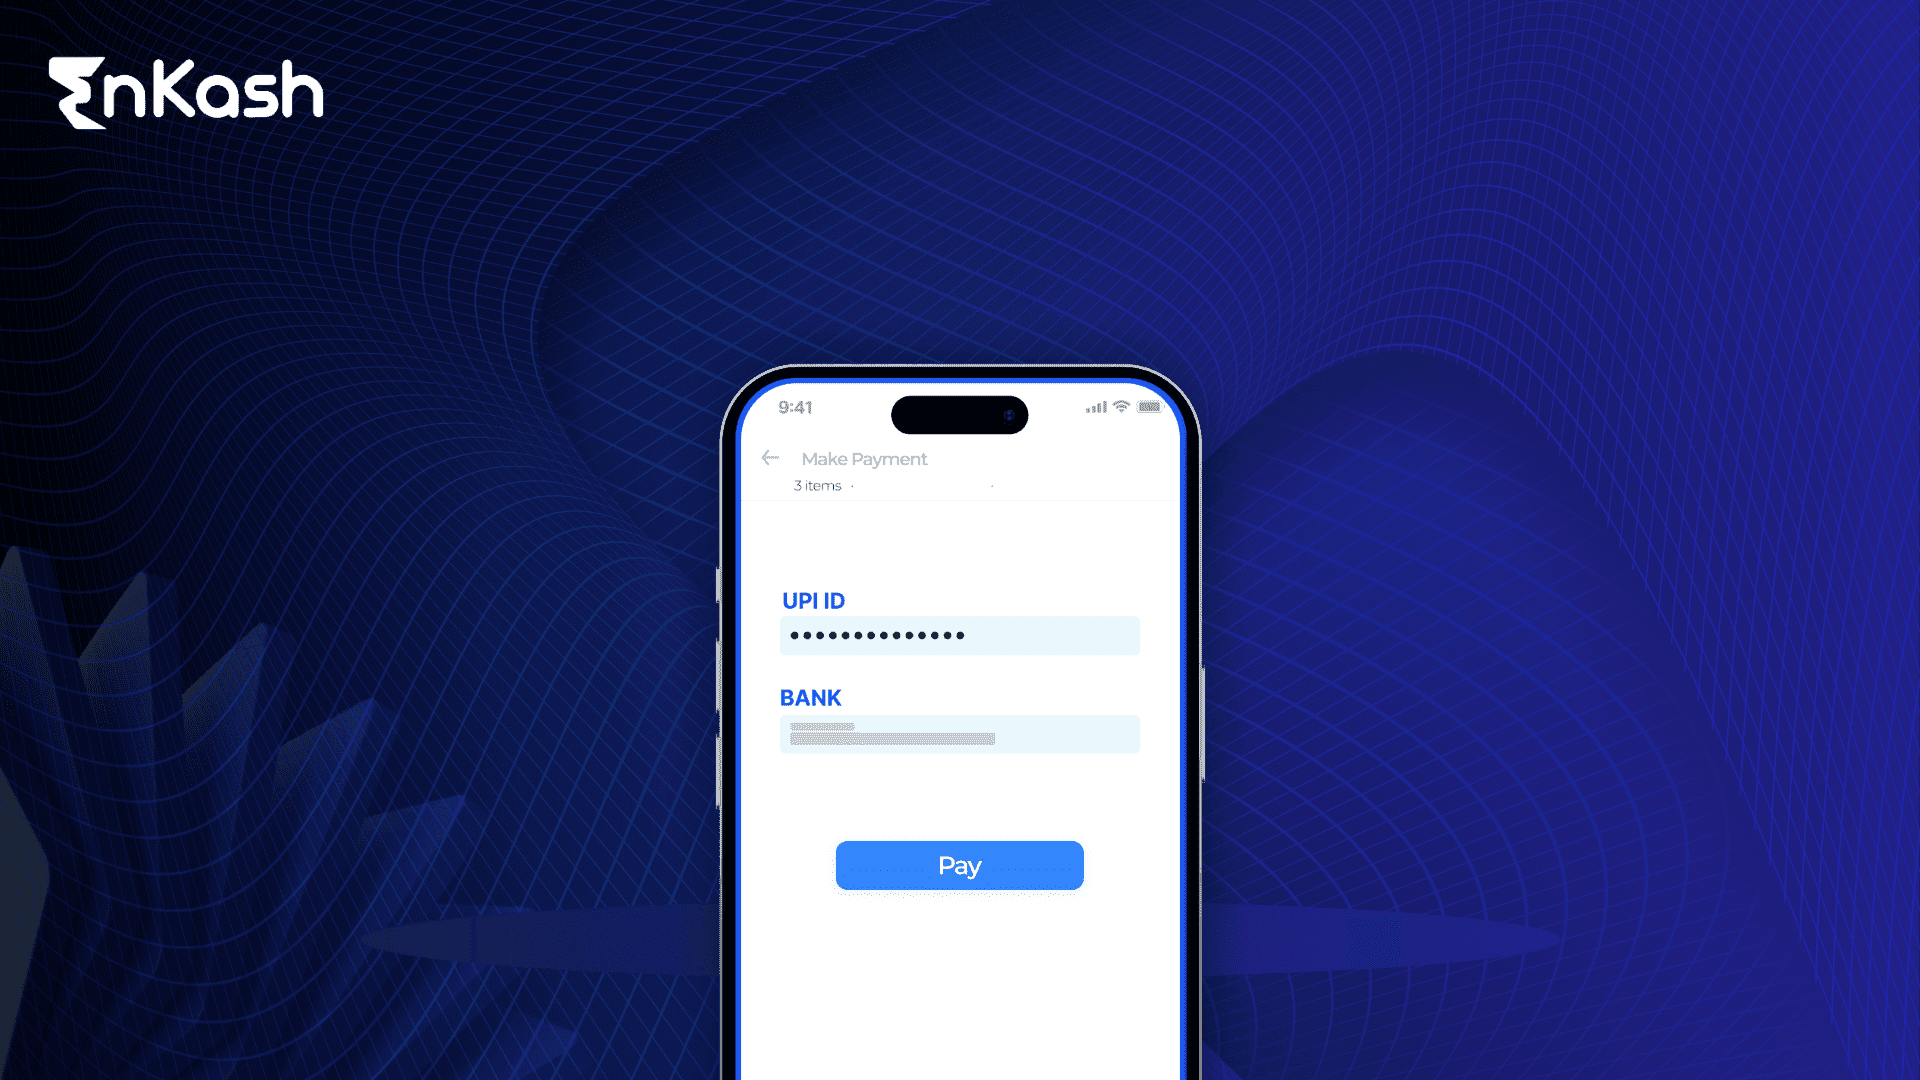
- Select the VPA option and enter the correct VPA, after the VPA is verified by the system you will be able to see the name associated with the account.
- Enter the amount, write a note if you want, and double-check all the details
- Once checked, click Proceed/Submit/Pay and enter your UPI PIN to successfully transfer the funds
Receiving Money
- To receive money using VPA, all you have to do is open any of your UPI apps and go to the profile section
- There you will be able to see your VPA/UPI ID. Copy that ID and share it with the sender. The sender can follow the above steps to send the money
- Some UPI apps like Google Pay also give the option to request money directly from the app itself. Just add the sender’s mobile number, click on the “Request” option, and enter the amount you want to request. Some apps set a limit on how much you can request in a single ‘collect’ transaction, but this limit varies by app and bank.
Use-Cases of VPAs
The use of VPAs extends beyond peer-to-peer money transfers. Here are some additional points on how VPAs are being leveraged nowadays:
- Merchant Payments: Many online and offline merchants now accept UPI payments. You can simply enter the merchant’s VPA in your UPI app during checkout, specify the purchase amount, and then enter your UPI PIN to complete the payment
- Bill Payments: Utility bills, recharges, and other recurring payments can be easily settled using a VPA linked to the respective service provider. For example, if you want to pay your electricity bill, you can do so online both at your electricity provider’s website and by using your UPI app. Some billers may ask you to enter your VPA, while others redirect you directly to your UPI app. Open the UPI app and enter your UPI PIN to process the transaction. In some cases, you might instead need to pay to the provider’s VPA, but this is not required for many billers.
- Donations and Crowdfunding: Many charity organizations and crowdfunding platforms are increasingly using VPAs by adding them to their pamphlets, websites, and visiting cards for convenient and secure donations.
Pay Utility Bills Seamlessly Conclusion
A VPA makes UPI payments simple, secure, and convenient for everyday use. Instead of sharing long bank details, you only need one easy-to-remember payment address to send or receive money. It keeps your information private, reduces errors, and works instantly across all major UPI apps.
Whether you use UPI for personal payments, business transactions, bill payments, or online purchases, a VPA helps you manage everything smoothly. As digital payments continue to grow in India, understanding how a VPA works makes it easier to use UPI confidently and safely.
If you ever need to receive money quickly or want a secure way to share your payment details, your VPA is the simplest option.
FAQs:
1. What is the difference between a VPA and a UPI ID?There is no difference between a VPA and a UPI ID; both terms refer to the same virtual payment address used to send or receive money via UPI.
2. Can I create my own VPA?Yes. Most UPI apps let you choose a simple and personalised VPA, as long as the username is available.
3. How many VPAs can I have?This depends on the UPI app.
Some apps allow only one VPA, while others let you create multiple VPAs for the same bank account.
4. Is it safe to share my VPA with others?Yes. Sharing your VPA is safe because it does not reveal your bank account number or IFSC code. Just avoid sharing it publicly to stay protected from scams.
5. What happens if I enter the wrong VPA while sending money?Your UPI app will show the name linked to that VPA before you confirm the payment. If the VPA is invalid, the transaction will not go through.
6. What should I do if a payment using VPA is delayed or failed?Open your UPI app, go to the transaction history, and select the payment. You can tap “Report Issue” to raise a complaint directly. Your bank or the app will resolve it.
7. Can someone misuse my VPA if I lose my phone?No. UPI payments need your UPI PIN, which only you know. Still, you should block your SIM and inform your bank for safety.
8. Can I use the same VPA in multiple UPI apps?No. A VPA created in one UPI app cannot be used in another app. Each app generates its own VPA, but all can be linked to the same bank account.